Would you prefer to have Windows 8 bypass the Start Screen and boot straight to the desktop? If so, you can do so using a technique that takes advantage of a feature that is built right into the operating system - no third-party tools required. All you have to do is create a specially configured task that is scheduled to run at log on.
In this post, I’ll walk you through the steps required to make Windows 8 boot straight to the desktop using a specially configured scheduled task.
As you may recall, in previous versions of Windows, a special shortcut called Show Desktop appeared on the Quick Launch menu. This shortcut was a standard text file that contained five lines of code and was saved with the file extension SCF. The fifth line of that code was
Command=ToggleDesktop.
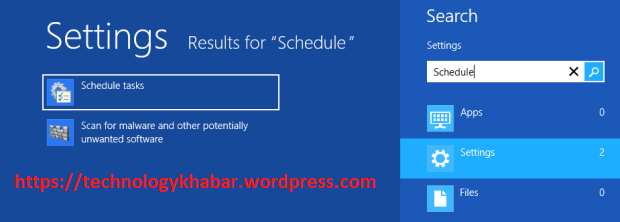
To begin you’ll need to launch the Task Scheduler tool. To do so, just press the [Windows] key, type Schedule, select Settings, and click Schedule tasks, as illustrated in
Figure A. When you do, the Task Scheduler will appear.
[caption id="attachment_3" align="alignnone" width="594"]
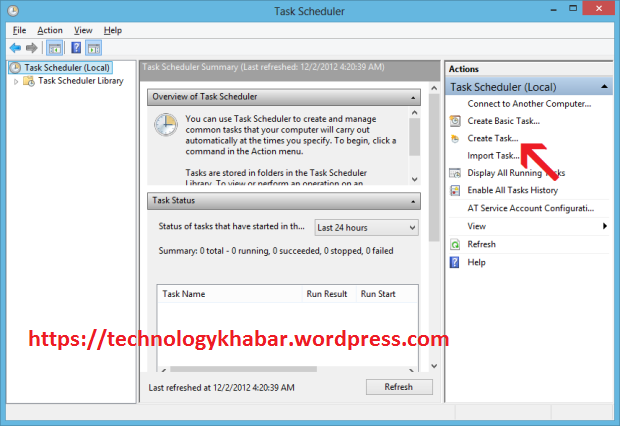
Task Scheduler[/caption]
Configuring TaskOnce you have the Task Scheduler up and running, you’ll begin by clicking the Create Task command in the Actions panel, as shown in
Figure B.[caption id="attachment_4" align="aligncenter" width="594"]
Create Task Command[/caption]
When the Create Task dialog box appears, you’ll see that the General tab is selected and will first assign the task a name in the Name text box. As you can see, I choose Show Desktop @ Start. Then, towards the bottom of the page, select Windows 8 from the Configure for drop down menu, as shown in
Figure C. You can leave the Security options set to Run only when user is logged on.
[caption id="attachment_5" align="aligncenter" width="594"]

Creating a Task[/caption]
To continue, select the Triggers tab to access that page, as shown in
Figure D. Now, click the New button towards the bottom of the page.
[caption id="attachment_6" align="aligncenter" width="594"]
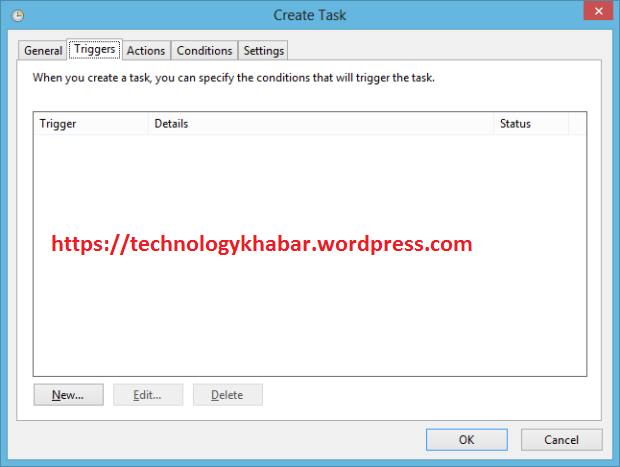
Trigger Command Page[/caption]
When you see the New Trigger dialog box, select the
At log on item from the Begin the task drop down menu, as shown in
Figure E. As soon as you do, the New Trigger page will refresh and display the settings for the
At log on option, as shown in
Figure F.[caption id="attachment_7" align="aligncenter" width="594"]
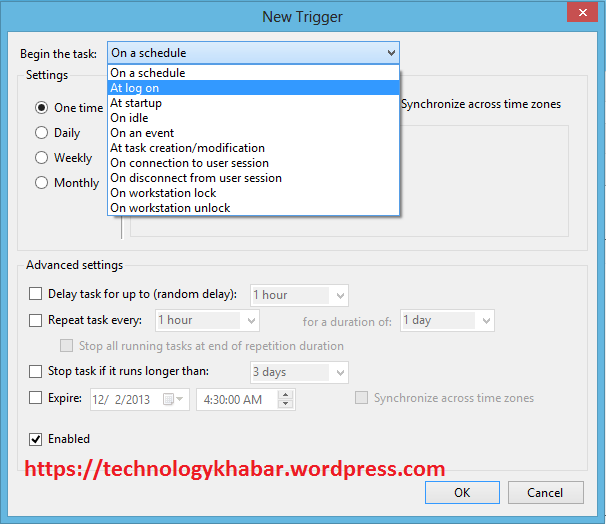
When Command Triggered Selection[/caption]
[caption id="attachment_8" align="aligncenter" width="594"]
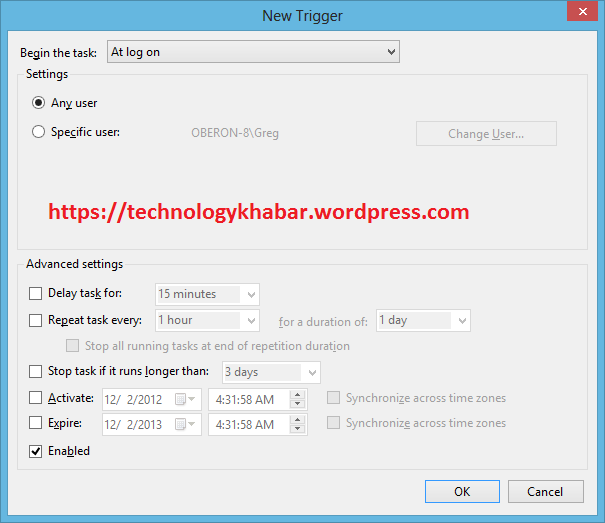
Command Triggered when User Log On[/caption]
By default, the Any user option in the Settings panel and the Enabled check box in the Advanced Settings are selected. Just leave them as they are and click OK to continue. When you return to the Create Task dialog box, select the
Actions tab, as shown in
Figure G. Then, click the New button towards the bottom of the page.
[caption id="attachment_9" align="aligncenter" width="594"]
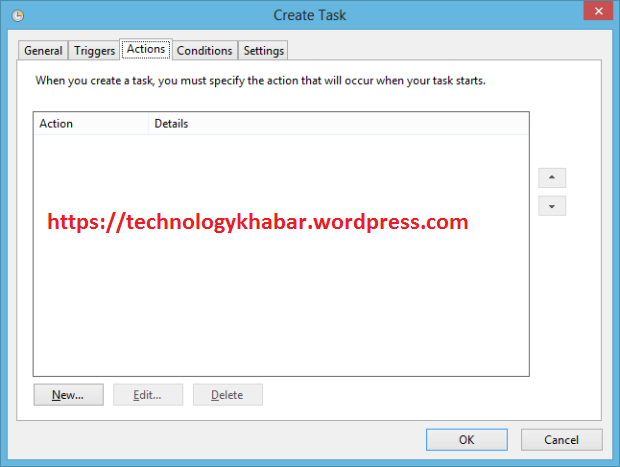
Command Action[/caption]
When you see the New Action dialog box, you’ll find that the Action setting is by default set to Start a Program. So, in the Settings panel, you can just type
c:\Windows\explorer.exe in the Program/script text box, as shown in
Figure H. You can also use the Browse button to locate and select the explorer.exe program. At this point, just click OK to return to the Create Task dialog box.
[caption id="attachment_10" align="aligncenter" width="468"]

Specify Action Path[/caption]
Now,
IF you are running Windows 8 on a laptop, select the Conditions tab and in the Power panel, clear the Start the task on if the computer is on AC power check box, as shown in
Figure I.
[caption id="attachment_11" align="aligncenter" width="594"]
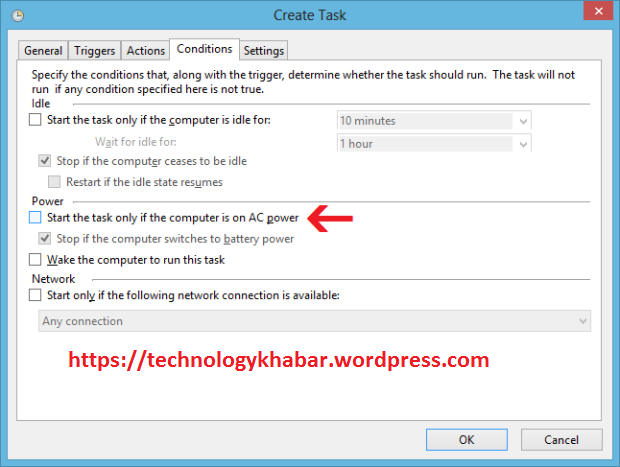
Creating a Task[/caption]
There is nothing that you need to change on the Settings tab so, at this point, you are done and can just click the OK button to complete the scheduled task operation. When you return to the Task Scheduler window, you’ll see the new task that you just created on the Task Scheduler Library, as shown in
Figure J. You can now close Task Scheduler.
[caption id="attachment_12" align="aligncenter" width="594"]
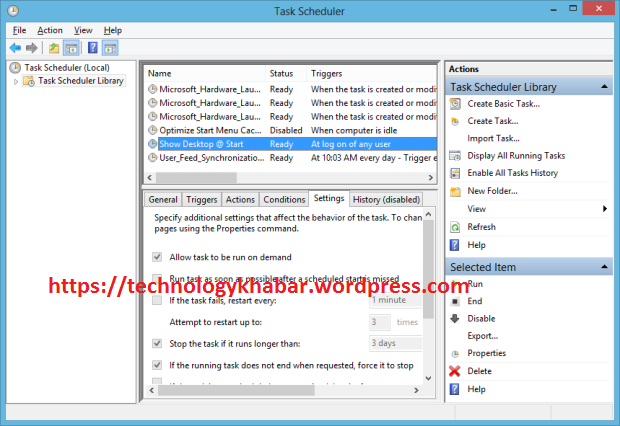
Schedule a Task[/caption]
Your task is done now. When Windows 8 restarts, you’ll immediately see the Desktop with a File Explorer window targeted on Libraries, as shown in
Figure M. You will not see the Start Screen at all.
(Keep in mind that when you see the File Explorer window targeted on Libraries, the Documents Music, Pictures, and Video icons may shuffle around a bit. The reason for this is because when the File Explorer window appears on the screen, the operating system is still doing a bit of housework in the background.)
[caption id="attachment_13" align="aligncenter" width="594"]
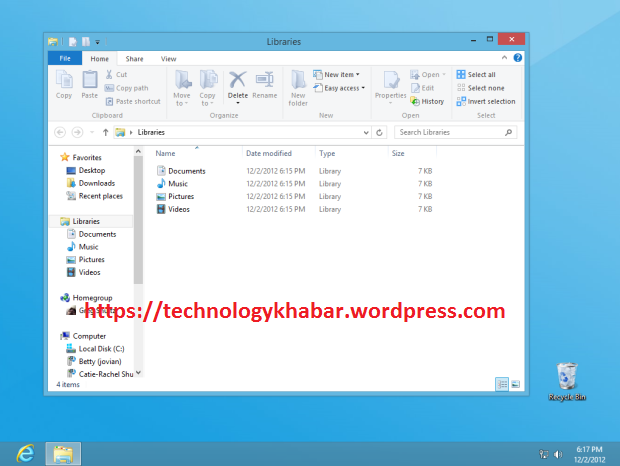
Windows 8 Desktop[/caption]


